11 Jul 2003
Thanks again, to "Stinky Wet Dog" for allowing me to ever-so-slightly modify his original tutorial (for WebTv users). You can view his original tut HERE. The output settings are different because I used different sized glitter bars than his. The other difference is Browsing to your file instead of posting an URL, as well as how to save. I didn't specify, since I use a PC & I don't know the method for saving to a Mac.
Here is the link to ImageMagick (I used a different site to make the screenshots, so it will look slightly different): Click Here For ImageMagick You DO NOT download the program! It is used online!
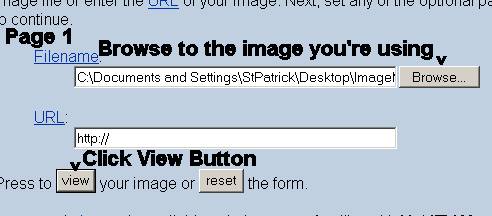
Here is an image to use - please save to your hard drive! 
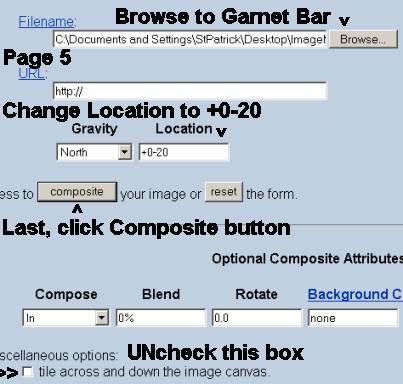
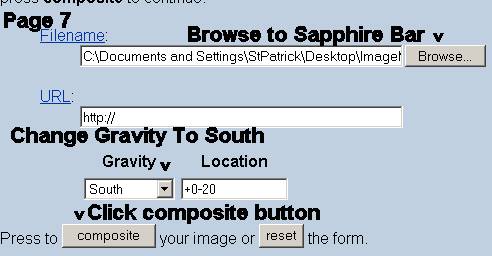
Here are the links to the glitter bars we will be using (also save to your hard drive, please): Platinum Glitter Bar , Garnet Glitter Bar , Sapphire Glitter Bar .
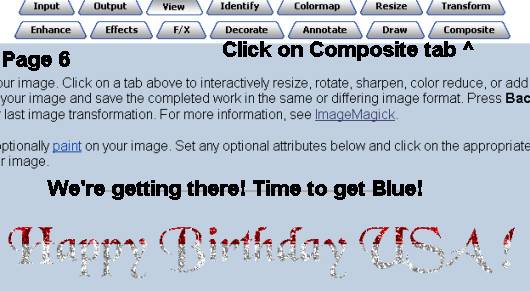
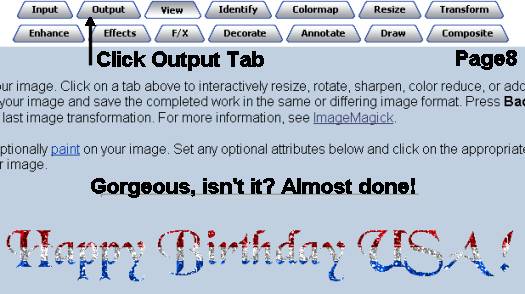
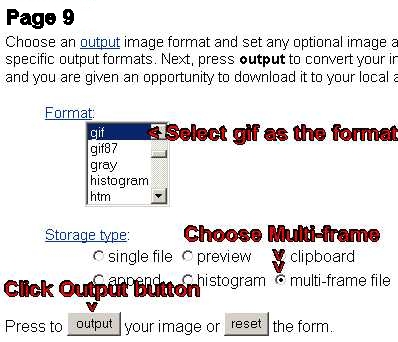
Just follow the screen shots - it's VERY easy!
Edit In 080705: It seems there has been an update to Image Magick since I did these tutorials 2 years ago. What was labled "Location" is now labled "Offset" & it has switched places with the "Gravity" setting. Instructions are the same, just a different name. : )

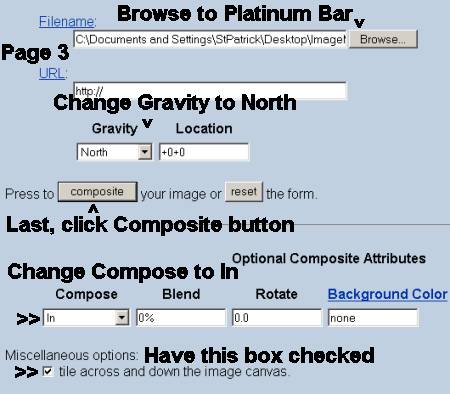
Here is where you might have to play with the settings a bit. This is specific to this image, using my glitter bars. If your image is a different size or font, or your glitter bar is a different size, the second Offest number will be different. A lower number (or a minus "-" number) will set the glitter lower on the image. A higher (or plus "+" number) will place the glitter higher.Adjust to suit your needs.
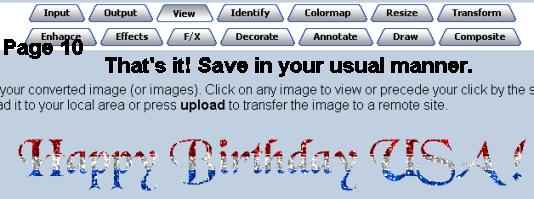
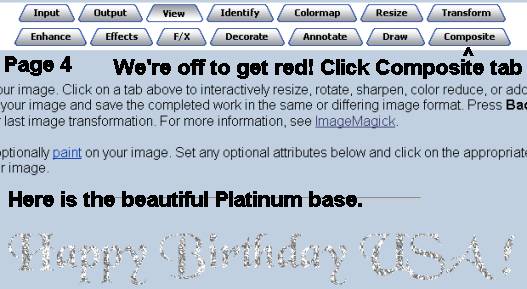
Here is the finished image:

|
